Sunday, December 21, 2014

Cream Cheese Sugar Cookies

sugar cookies christmas
One last Christmas post before the big day! These cookies are a favourite of mine around this time of year. My mom always made some and we would spend an afternoon decorating them together. Although, I’m sure I complained quite a bit. These cookies are quite time consuming because of the decorating, but they are totally worth it in the end. Merry Christmas Everyone!

sugar cookies cream cheese

cream cheese cookies


Cream Cheese Sugar Cookies

Cookies
200 g cream cheese softened
1 cup sugar
1 cup butter softened
2 1/2 cups flour
1 tsp vanilla extract
1/4 tsp salt
1 egg yolk (you can save the white and make a DIY face mask)

Blend together cream cheese, sugar, butter, egg yolk, vanilla extract, and salt with an electric mixer.  Stir in flour with a wooden spoon, until well blended. Refrigerate dough for two hours.

Preheat oven to 375 ̊F or 190 ̊C. Working with about a third of the dough at a time, roll it out on a lightly floured surface to about 3-5 mm thick. Use cookie cutters to cut out shapes and place your cookies on an ungreased cookie sheet. Place in the oven for about 6-7 minutes. Make sure to keep a close eye. These cookies should be taken out as soon as any browning begins to happen. Let the cookies cool on a wire rack. Make sure that they are cooled completely before icing them. I waited until the next day. These cookies can also be kept in the freezer and take out about 30 minutes before eating.

Glaze
powdered sugar
food colouring
water or milk

For every one cup of powdered sugar you use add about a tablespoon of milk or water. You want the glaze to be thick enough that it won’t drip off the cookies, but thin enough to squeeze out of a bag. Add the liquid to the powdered sugar and stir until combined with a rubber spatula. Add in your desired amount of food coloring last and mix again. Spoon the icing into a ziplock bag and cut a small hole in tip. Instant piping bag!

Makes a ton of cookies!

christmas sugar cookies

Wednesday, December 17, 2014

Rein-Beers

duy gift idea men reinbeers
A few years back, I made these wonderful rein-beers for the Simmering Seoulmate, and then a year later I made them again for his father. They absolutely loved them and they’re ridiculously easy to make, which makes this DIY perfect for any man on your list. All you need is a glue gun, some pipe cleaners, googly eyes, pom-poms and of course his favourite beer! You can also use non-alcoholic bottled drinks or a soda drink for kids at your next holiday party.

These are the ones I made for the Simmering Seoulmate's father a few years ago.

What you need:
6 bottled beers
12 googly eyes, any size
6 red pom-poms
40cm brown pipe cleaner per beer, so I used 240cm.
scissors
hot glue gun, extra glue

What to do:
Take a 40cm long piece of pipe cleaner and cut two 8 cm pieces off. Wrap the longest piece around the top of the bottle and bend the ends up. Then, take the two small pieces and tie each one around the bent ends creating an antler shape.

reindeer beers

Next, use the hot glue gun to glue on the eyes and pom-poms below the antlers. That’s it! You’re finished. You can go the extra step and cover the beer case with wrapping paper.

reinbeer

reinbeers christmas

Check out the rest of my holiday posts by clicking here.
Check out my other DIY post by clicking here.

Sunday, December 14, 2014

White Chocolate Peppermint Cookies

Christmas cookies white chocolate peppermint
It’s Christmas baking season! With only a few weekends left before Christmas, there isn’t much time for baking. Today, I dedicated the afternoon to baking these yummy treats. Hopefully, I will have time to bake more cookies in the coming week. I originally wanted to make reverse chocolate chip cookies, but I only had about a half cup of white chocolate chips left. Oh no! Time to get creative! I decided to add some chopped up Hershey’s Cookies and Cream bar, some smashed up peppermint candies, and finally I topped the cookies with candy cane bits before placing them in the oven for a festive touch.

White Chocolate Peppermint Cookies

Ingredients
2 1/4 cups flour
christmas cookies peppermint2 eggs
1 cup butter, room temperature
3/4 cup sugar
2/3 cup brown sugar
2/3 cup cocoa
1tsp vanilla extract 1 tsp baking soda
1/4 tsp salt
1/2 cup white chocolate chips
1/2 cup Hershey’s cookies and cream bar, chopped
4 mini candy canes, smashed
15 peppermint candies, smashed (If I had more candy canes, I would have used those)

Directions
Preheat oven to 350 ̊F or 177 ̊C. In a medium bowl, combine flour, cocoa, salt, and baking soda. Set aside. In a large bowl, cream together butter, sugars, and vanilla with an electric mixer. Add in eggs one at a time, mixing completely. Slowly add in the dry ingredients and mix with a wooden spoon. Fold in chocolate chips, Hershey’s chocolate pieces, and peppermint bits. Drop rounded tablespoons of dough onto an ungreased cookie sheet. Push the balls down slightly and sprinkle crushed candy canes on top of each cookie. Bake for 10 minutes and let cool.

Makes about 3 dozen cookies.

white chocolate peppermint cookies christmas

Monday, December 8, 2014

Polish Pierogi

polish cheese potato pierogi
Christmas is fast approaching and with the shopping, busy school schedule, and prepping for vacation, I am finding myself slightly overwhelmed. This will be my third Christmas away from my family back in Canada and it’s the one holiday I have the hardest time missing. Being in Korea hasn’t been all that difficult for me as far as adjusting to living in a different country and I haven’t had a difficult time with homesickness, but Christmas is my favourite holiday and there are so many things I miss. I miss our annual tree trimming party and helping prepare all the wonderful trays of food, the smell of a real tree filling our living room, the beautiful flower arrangements my dad makes every year, the decorations…so many decorations, my family, and last but not least, our traditional Polish Christmas Eve dinner.
Our family Christmas Tree a few years ago.
Every year on Christmas Eve, my mother’s side of the family used to get together at my Babcia and Dziadzia’s house to celebrate. We would eat a feast of fish and at least four kinds of pierogi that my Babcia spent all day making. When I was younger I didn’t care for fish, so that meant my plate was filled with pierogi. In fact, my cousin and I used to compete to see who could eat the most. I’d like to think I won every year, but who knows. Now that my grandparents have passed away, and the children have grown, the tradition has lost some of its magic. My mom still makes pierogi and my cousin has made some too, but none will ever be as fantastic as my Babcia’s. Every year that I have been away from home that tradition is the one thing I miss the most.

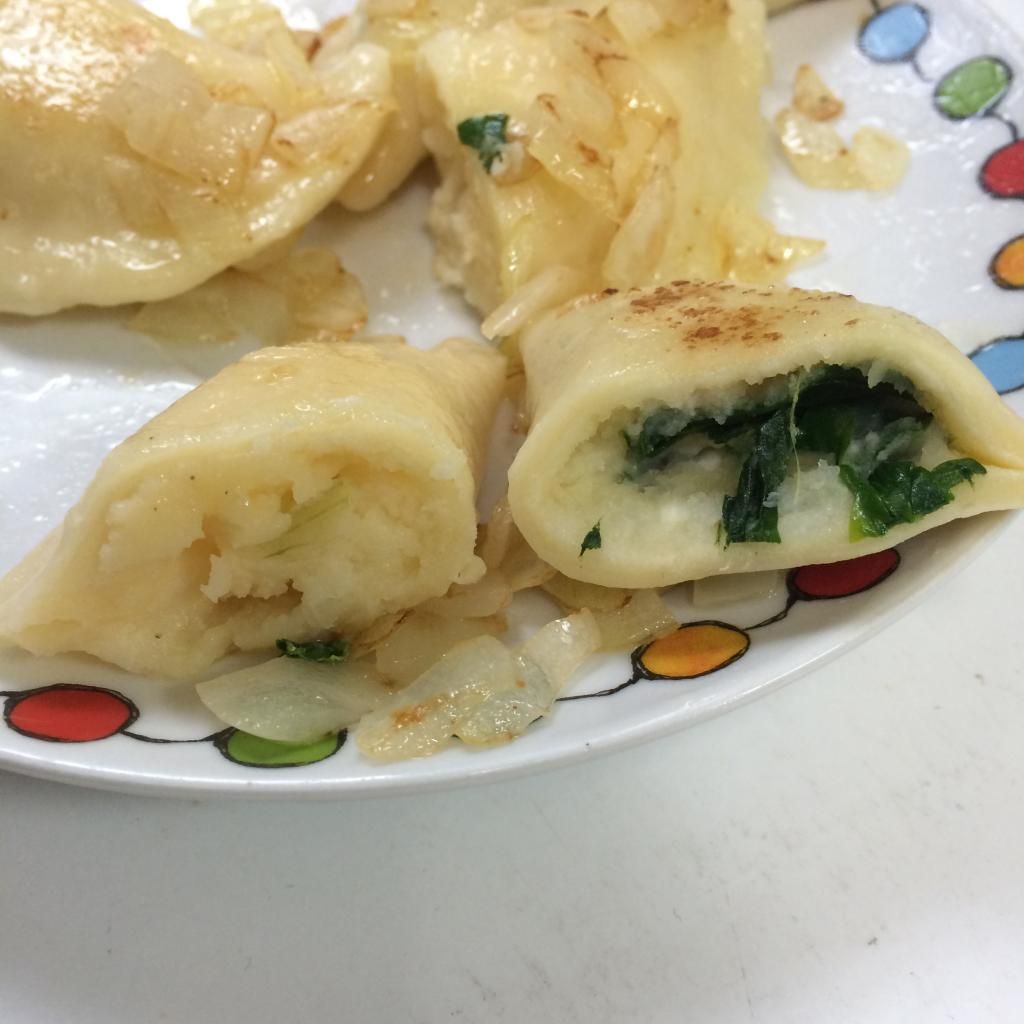
This year, I will be in Korea on Christmas Eve, so the Simmering Seoulmate and I spend one afternoon making some pierogi, so that I can have a little piece of home this Christmas. We made the classic potato and cheese filled ones and saved some of the mashed potato and made some feta and spinach ones, too. Check out the recipe below to see how to make these polish delights! Merry Christmas.

mashed potatoes
potato cheese pierogi
pierogi dough
potato cheese pierogi
pierogi
pierogi
pierogi

Polish Pierogi
Ingredients
Dough
4 1/2 cups flour
3/4 cup warm milk
3/4 cup warm water
2 egg yolks
3 tbsp melted butter
1 tsp salt
Potato and Cheese Filling
1 onion, finely chopped
1/4 cup butter
6-8 potatoes
1 cup grated cheddar cheese
salt and pepper to taste


Directions
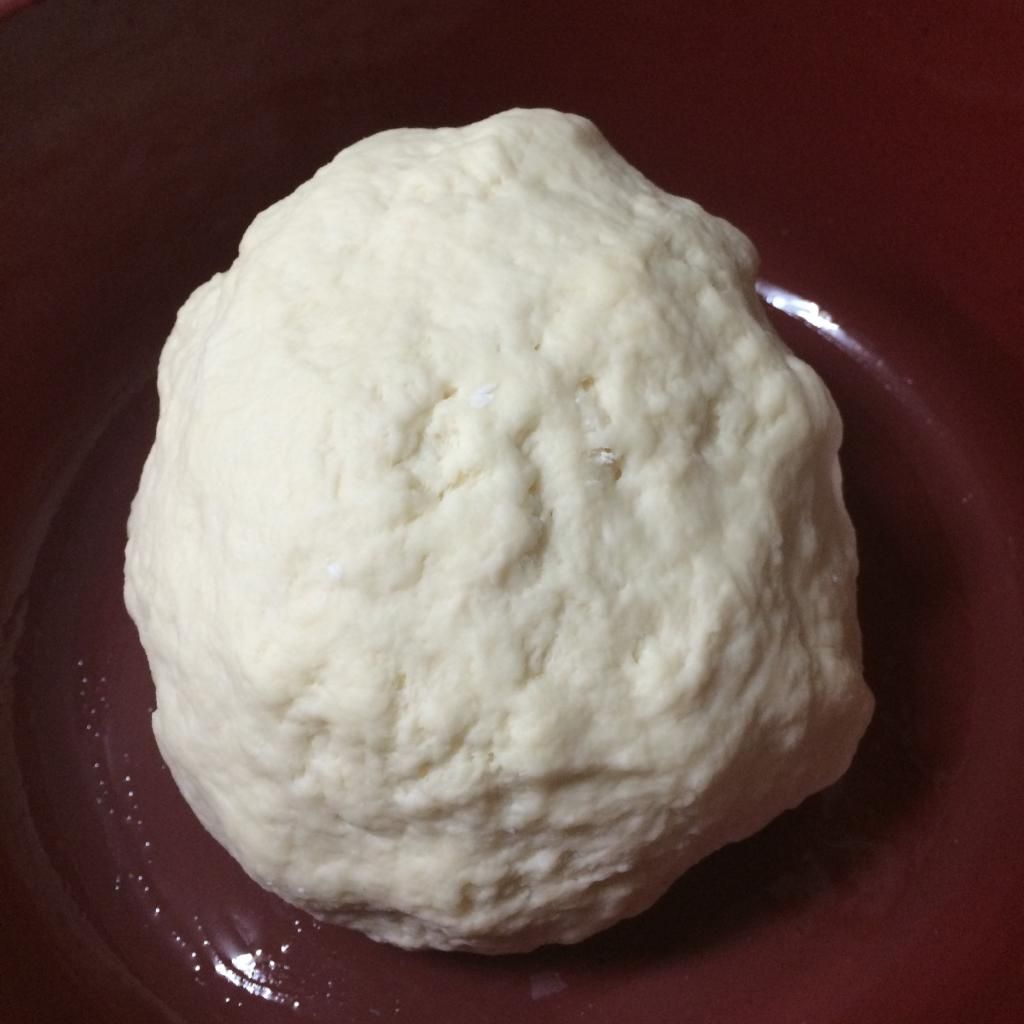
Dough: In a large bowl, combine egg yolks, milk, water, and butter mixing well. Stir in flour and salt. Knead for 5 minutes on a lightly floured surface or until ingredients are well combined and the dough is smooth and soft. Place dough in a lightly oiled bowl. Cover with a kitchen towel and let rest for 30 minutes.

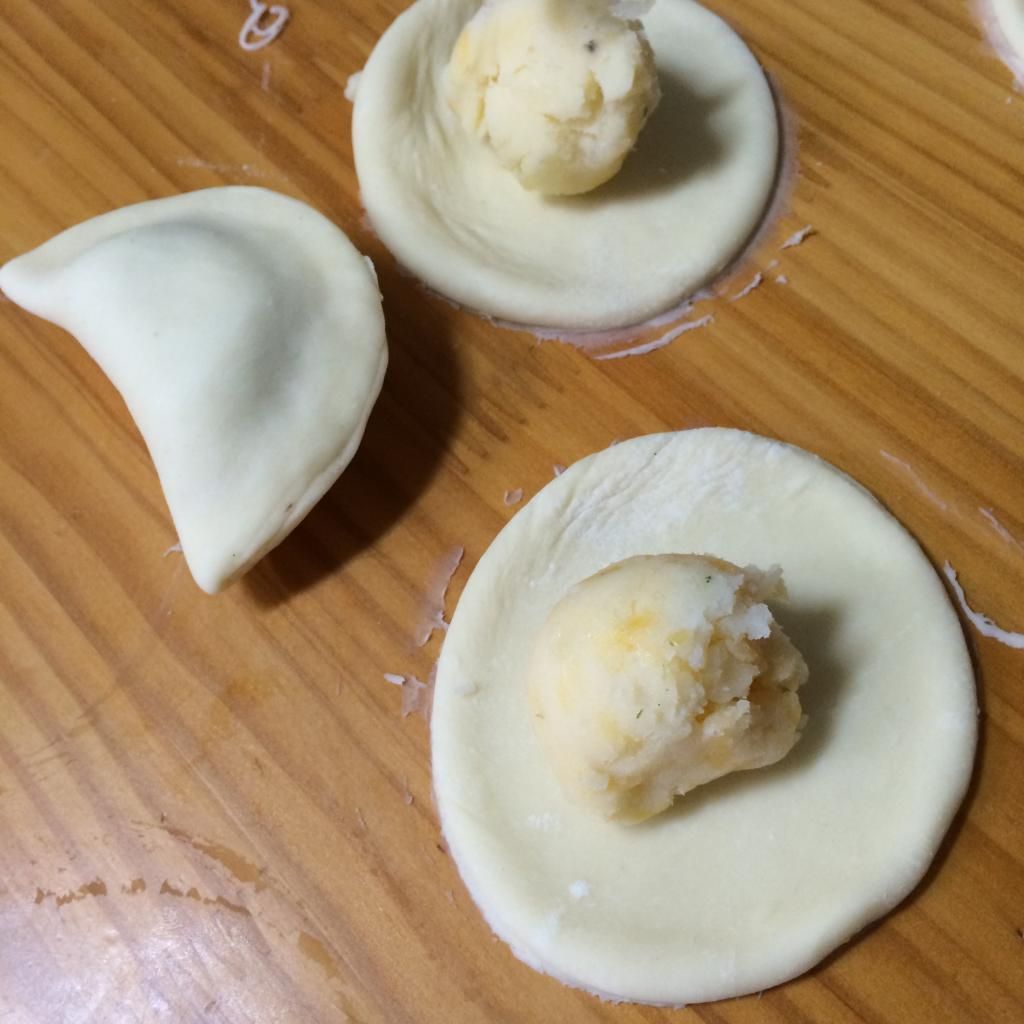
Filling: Meanwhile, peel and cut potatoes into large pieces. Place potatoes in a large pot of water. Bring to a boil and cook for 15-20 minutes or until soft. Mash potatoes in the pot with a potato masher. Sauté onions in butter over medium heat until they are soft and clear. About 2-3 minutes. Add them to the mashed potatoes. Stir in cheddar cheese. Add salt and pepper to taste. Let filling cool.

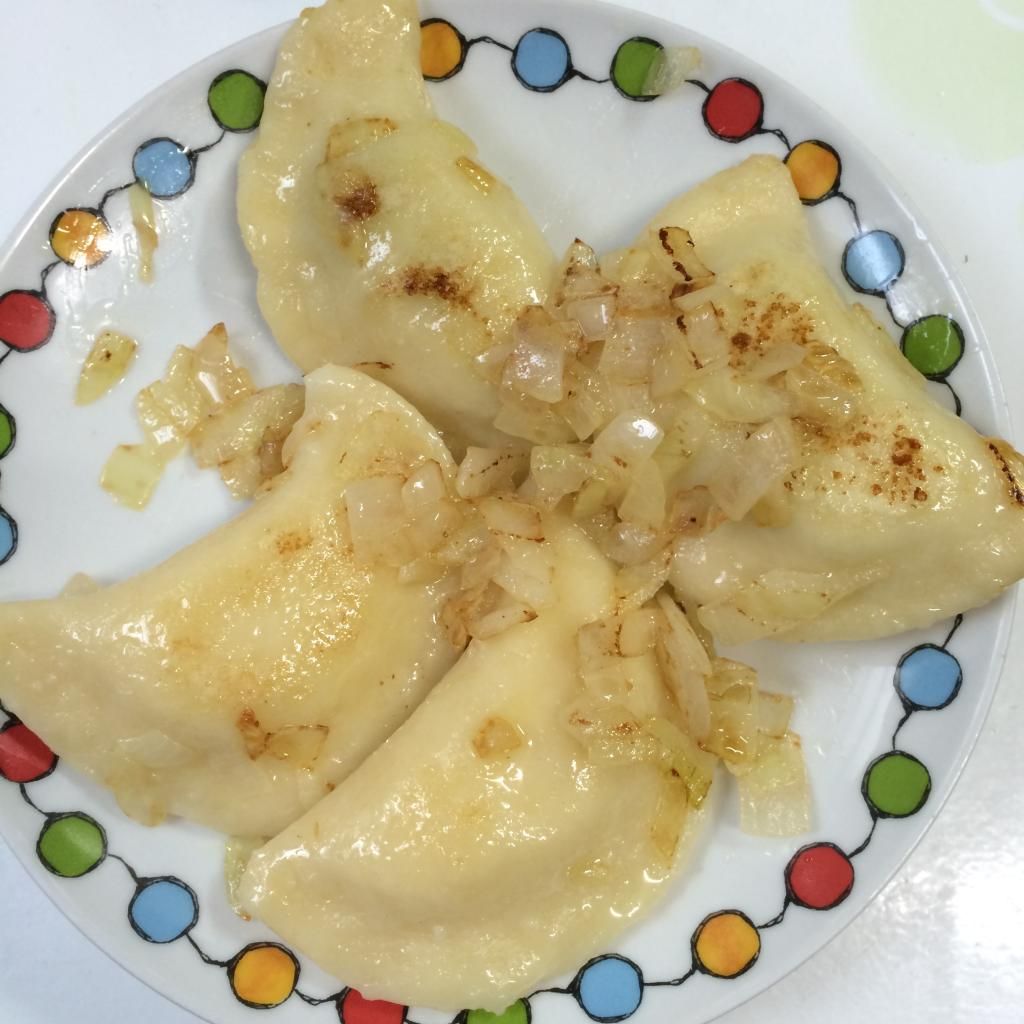
Once the dough has had time to rest, working with half the dough at a time roll it on a floured surface to about 3mm thick. Cut circles in the dough using a round cookie cutter (or if you don’t have one, use a cup like I did).  Place a tablespoon of filling in the center of each circle. Fold over creating a half circle and pinch the edges closed. If eating right away, cook pierogi 10 at a time in a large pot of boiling water for about 5 minutes or less. You will know they are ready when they float to the top of the water. Stir a few times to prevent sticking. Serve with sautéed onions and sour cream. If you are freezing them like we did, place in a single layer on a parchment paper liner cookie sheet and freeze overnight. In the morning, move frozen pierogi to a zippered freezer bag. If cooking from frozen, they may need a few extra minutes in the boiling water. Enjoy!

Makes about 6 dozen.

pierogi

Wednesday, December 3, 2014

Easy Egg White Face Mask

egg white face mask diy beauty

I have another food beauty DIY for you! This time it’s a speedy face mask. With only 3 ingredients and less than a minute to make, pampering just got a whole lot easier.

What you need:
1 egg white
1 tsp fresh squeezed lemon juice
1/2 tsp honey

How to make your mask:
In a small bowl, whisk together egg white with lemon juice until frothy. Next, whisk in the honey until combined.

Directions for use:
First wash your face with warm water to open up your pores. Pat your face dry with a towel. Next, use your fingers to apply the mask to your face using circular motions. Be careful to avoid those sensitive areas around your eyes and lips. Now lie down and relax for 15 minutes, while the mask dries. Wash off using warm water.

Mask benefits:
Wow! My skin felt so nice after this mask. It felt so refreshing and my skin was soft and smooth. Egg whites have a ton of benefits for your skin, are great for tightening and toning your skin, and they help to shrink pores. I have combination skin, which means I have a very oily t-zone and dry patches on my checks. I love that the egg white has moisturizing properties, but also helps to remove grease.

As the holiday season approaches, make some time for you and try this mask out yourself. Also, don’t forget to check out my other beauty DIY post here

beauty diy egg white mask